

Tour › Add a store-bought target
Add a store-bought target
A target GroupLab does not know yet, photographed blank and turned into a small fingerprint file in five steps, one question at a time, to send so a later GroupLab recognizes it.
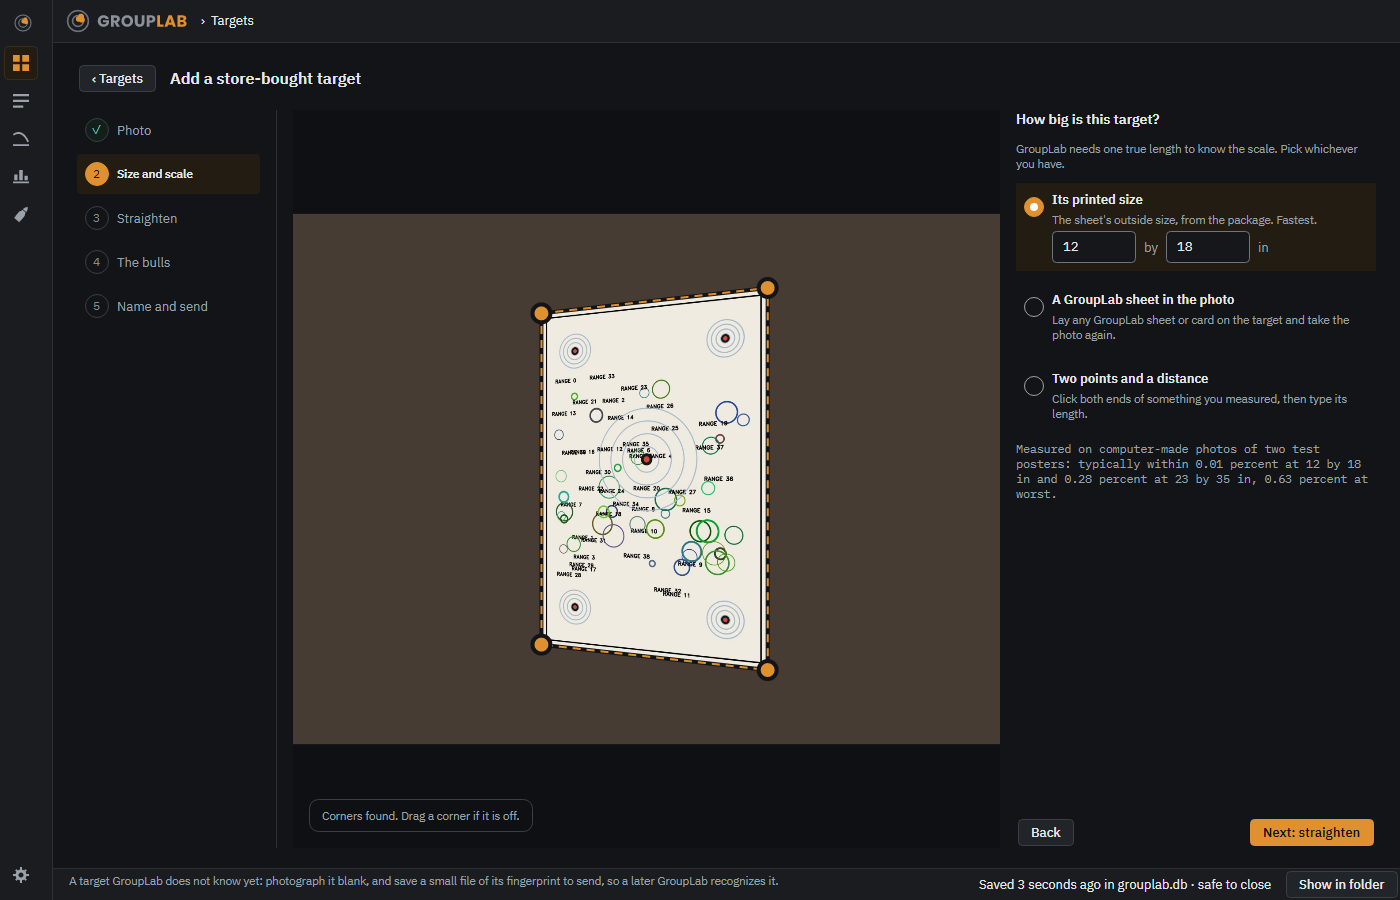
From the newest build of GroupLab, regenerated every week. Tap the picture for it full size.
On the phone in the same five steps, full screen: a five-part progress bar with Back at the top, one big button at the bottom, and on the last step Save and share the file, through the phone's share sheet. The picture of it on the phone comes at the next device sitting.
What this screen is for
GroupLab names a few store-bought targets by themselves and takes their scale from their printed size. Every other one has to be taught, and teaching it means a fingerprint: the features of its printing, its layout, its size and where its bulls are, made from a photograph of a blank one. These steps make it. The photo is read for the target's four corners; one true length sets the scale, from the printed size on the package, a GroupLab sheet laid on the target, or two points a measured distance apart; the target is straightened; you confirm its bulls; and you name it and save the file. The file holds the fingerprint, the name, the size and the bulls, never the photo, and each one sent is checked by hand before it joins the library a later GroupLab recognizes.
Without a GroupLab sheet
This screen is for targets GroupLab did not print. It never reads a GroupLab sheet as the target; a GroupLab sheet in the photo is only a ruler for the scale. What GroupLab can measure.
What you are looking at
- The steps on the left. Photo, Size and scale, Straighten, The bulls, and Name and send: done steps ticked in teal, the one you are on in amber.
- The photo in the middle. The target as photographed, its outline found and its four corners as amber handles to drag where one is off.
- How big is this target?. Three ways to give one true length: its printed size, with width and height boxes; a GroupLab sheet in the photo; or two points and a distance. Under the one picked, what GroupLab measured for that way on test photos, never a promise that one is always best.
- Back and Next. Back keeps what you did; Next names where it goes, and on the last step becomes Save reference file.
What you would do here
- Open Targets and choose Add a store-bought target.
- Choose a photo of the blank target, flat and square on, all four corners in it.
- Give one true length, then check the corners and the bulls.
- Type its name and choose Save reference file, then send the file.
Where it fits
Before you shoot a target GroupLab does not know. Once a later build carries its fingerprint, a photo of it shot is named, its bulls placed and its scale set, as the five Birchwood Casey targets are now.